Friday, May 16, 2014

5 Weeks have gone by.... Decor & where we stand with the builder on issues

Hey Blogger Friends!

It's been a little over a month since I have posted. I apologize! We are in full swing at our RV Dealership and have been super busy, which is great! I haven't found the time to post anything.

We have also been busy at the house! It's really starting to feel more like home. There are still many bare walls and I know that in time, they will be filled. We were able to take our Spring family pictures in our neighborhood which was awesome. There are still many lots that aren't built on and the tall overgrown grass made for a great backdrop.

I have used the same amazing photographer for 6 years now and I trust her completely with our family pictures. I don't take a ton of pictures anymore so I really treasure these professional shots. Her name is Carrie Yarborough, if you are near the Upstate of SC, check her out!

Just a few lots down from us, gorgeous mountain views.


In front of our front door

A few lots down from ours...


--------------------------------------
 
We've been busy inside the house, my office is almost complete!
 
The Ikat rug is from Rugs USA
I stalked it for months because it sells out so quickly, I snagged it at 60% (may have been 70% actually) and it was back ordered for about a month and then finally arrived. I <3 it!
 
The frames are from The Organic Bloom
These frames are the most amazing pieces of decoration ever. I am obsessed... that is all.  
 
The light is from West Elm
Eclipse model in black
 
The chairs are from Target
Clearance last year for the colors I got.
 
Shelf is from World Market
Clearance last year, no link.
 
Curtains, I made. Click here for the post.
 
 
The desk. Ohhh the Steel Case desk. This was a rusted box I found for $50 on craigslist. I had it sandblasted and painted for $100.
 
 
--------------------------------------------------
 
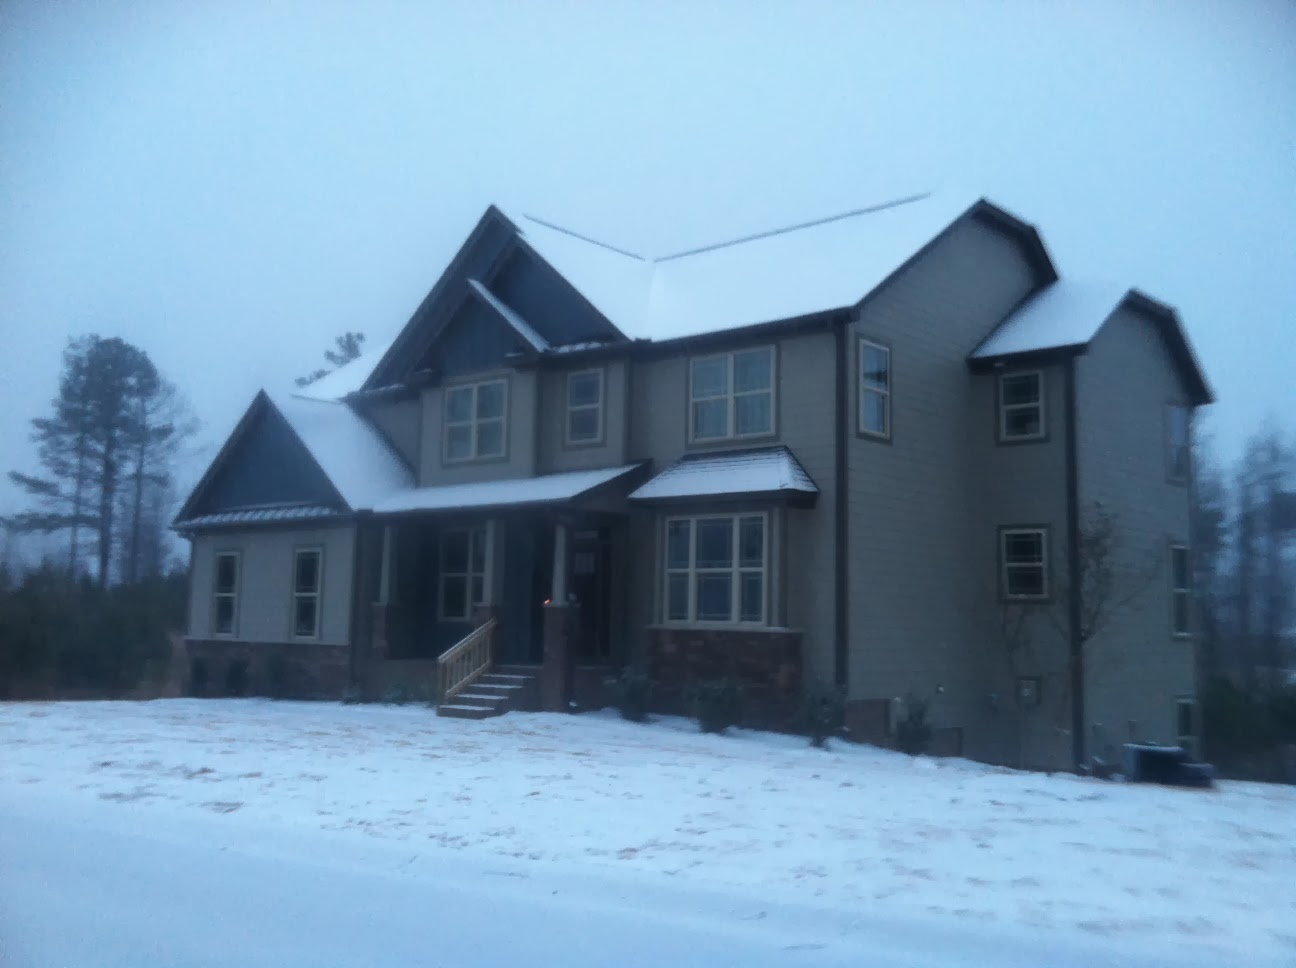
General house update:
 
Wow, did we miss a lot during our punch out list walk through. There are so many drywall issues that we just didn't notice so those will be on the 12 month list.

Our Punch out list is still not completely finished. I had to make an appearance at the builder's office to have the owner contact me. He did contact me and promised everything to be taken care of at the next appointment and that he would make sure we were happy. He showed up for maybe 40 minutes, he was very sarcastic when we tried to discuss the issues with him, he just didn't want to hear it. He kept saying "What's in the past is in the past, and I can't do anything about it but fix it now." well, it's still not fixed and we are so disappointed. When he decided to throw out the "We have built half a million dollar homes" line; I told myself that that conversation was over because he was extremely unprofessional.  
 
HVAC
We WERE reimbursed $325 from the HVAC company because of the high power bills. They discovered (after cutting a 3'x3' hole in my daughters closet) that whoever installed our ducting didn't use the brackets to finish. So whenever the air came on for the first time it all fell apart. This explains the extreme heat in my daughters room and bath room and the $400 power bills. They were very apologetic and I was happy to get that resolved.
 
Landscaping
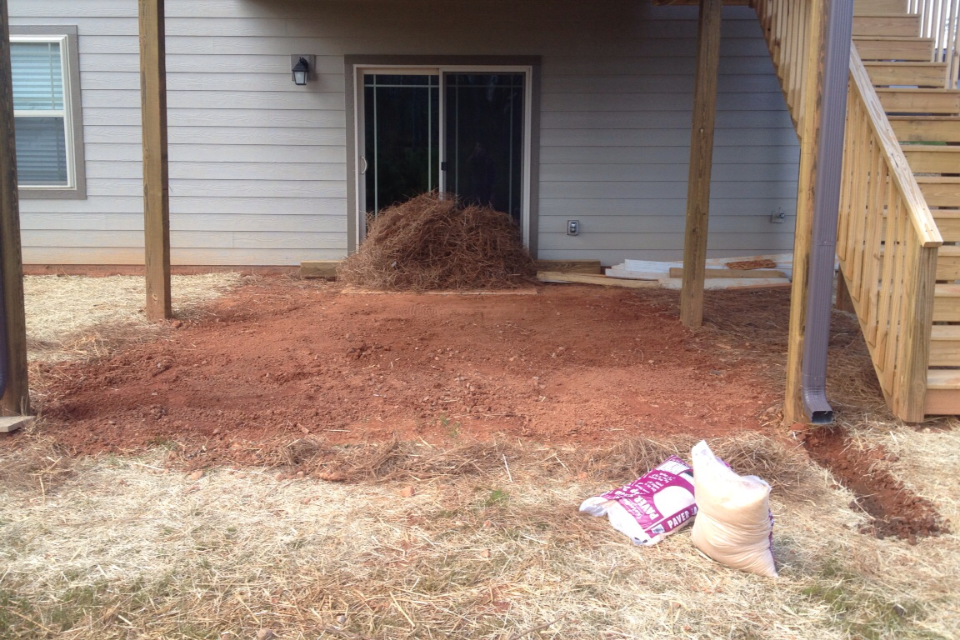
Our landscaping is a joke. The front yard was sodded, and it's fine. The sides and back were seeded and the contractor laid hay. Since the normal landscaper wasn't available for us back in December, our builder hired someone else who didn't know what he was doing. He laid way too much hay and laid the wrong seed. They also didn't remove the surface rocks. We have purchased a riding mower and have tried to loosen the soil and are having to reseed (for the FOURTH time). It's such a mess. Because of this, I haven't finished our paver patio, its just solid mud in the back at this point. I do have a small garden going and started to edge out for flowerbeds. I will hopefully have that done soon so the backyard looks somewhat decent.


So after having a few months to cool down about the build experience with SK I have concluded that:
 
 I would NOT recommend SK as a builder.
 
I wanted to wait and really step back and look at our experience, and I wanted to compare with all the other blogs and local friends I know who are building or who have built. I didn't want to make a fast decision out of anger. SK may be ok to build a "tract home" but they do know have the skill or professionalism to build a custom home. I can say that we had a terrible experience the entire time and are still battling with issues that they don't stand up to. I do love our home and it's beautiful, but it's not the way it should have been.  I'm not going to go bash their Facebook page...but you better believe that if I get asked by someone, they will get a truthful answer.
 
 
I can't wait to catch up with everyone else now, thanks for reading!
 

Saturday, April 12, 2014

Landscaping phase two: Paver Patio

We have been buuuusssssy outside these last few weeks! 
The weather has finally gotten nice and warm! Our first phase was the mulch bed in the front yard and some tree planting.
 
This second phase involves installing a patio under our porch with paver stones. I measured the area and figured we needed just under 250 12x12 stones. It didn't seem like a bunch until I started laying them. It's no joke. The builder poured a 3x6 cement walkout where the basement door opens so we are leaving that and adding the pavers around it. Because of this, we are having to dig a bunch of dirt out to get it level.
 
After digging the dirt, we laid a landscaping fabric to help prevent weeds in the future. We then added a layer of sand before laying the paver. I think we should have added a layer of rock but that's just too much work! I'm no where near being done but it does look really nice. I might be painting the pavers a dark brown. I'm excited to have another living space out there. After this project we want to have a housewarming party.

Before:
Those are pine needles that the builder laid, I need to reuse them somewhere
I also purchased these stealth flow gutter attachments to attach to the gutter next to the stairs. Since we are going to have a walkway, this will help route the water underneath the pavers:
Found on Amazon You can also buy them at Lowes.


Day One:

Because of the grade of our side yard, this area has a lot of moisture
in the ground, I'm hoping that planting these hostas underneath will help keep
the area a little dryer. I plan to plant hostas all up underneath the stairs.

Our goal is to have pavers all completely under the deck portion and to
 have a walkway to the stairs.

Day Two:


How long did you wait to stain/protect your deck or fence? That will be a part of our landscaping phase 3. I'll be working on the patio tonight and tomorrow, hopefully I'll get close to being done !

Thursday, March 27, 2014

Landscaping- Tree planting and adding new mulch beds!


I started the Landscaping 'phase 1' this week, it is hard work! The builder left a large pile of mulch on the side of our lot so I wanted to use it before someone else came and got it. I am planting a Yoshino Cherry tree about 20 feet away from the standard Crepe Myrtle that the builder planted for us.

Yoshino Cherry Tree

 
I removed about 25 pieces of sod from the area and laid landscaping fabric and then poured the mulch on top. The tree is not in yet so when it comes in I will be planting it.  The house I grew up in had 3 shaped mulch beds and I always loved the look of it, to me it makes the yard look more mature. I will be planting some other plants in the mulch beds too, I love Hostas; so they will be making their way in soon.

Before, small mulch bed around the crepe myrtle. 
 
After :)


--------------------
We planted 5 of our Leyland Cypress trees on the other side of the house, too! These grow 2-3 feet per year, so I'm hoping next year we will have a cute hedge
 
They are about 12 inches tall now.


No one can build in the bottom of the cul-de-sac but there are lots to the left of this picture, so this will give us some privacy when someone eventually builds there!


This picture shows the area in relation to the house.

I ordered the Leyland Cypress trees from Quick Trees . They sell them in bulk and give free shipping. I ordered 10 and they sent me 11 and the total was around $73.00. I want to plant the other trees on the other side of the yard, we just ran out of time (and energy)!


Thursday, March 13, 2014

Basement cleanup, Gardening and Office Desk set up!

I apologize for the wide gaps between posts lately. My husband and I work together at his family's company and it's our busy season! We sell RV's and we have been swamped, it's a great thing though. We need some dough to fund all these projects we have going on :)
 
We spent most of our day yesterday cleaning up the basement, and we still aren't done! I'm estimating the sq. ft. down there to be around 1500. The bad part was that the builder did not clean up their mess and there is a ton of red mud that has dried; it's gross. We bought a shop-vac from Lowes and started vacuuming everything. We organized the storage portion with my stockpile of home items (which btw, looks tiny now!) and organized all our other boxes and plastic storage bins. I still have about half of the floor/walls/windows to vacuum but it should go quicker now because the rest of the space is pretty much empty.
This section was vacuumed and you can still see all the red mud stains. We will have to mop to get it all up :(
 
We have a million lady bugs in the basement, I don't know how they are getting in...I'm assuming around the windows. Any tips for reducing this? We have ladybugs in the main levels of the house too but no joke, an army was in the basement :( 
 
We also purchased a good bit of gardening tools from Lowes, I can't wait to get started! We purchased some planters for strawberries, cilantro and spinach; and we purchased beans, zucchini, beets and 2 blueberry bushes. My husband is obsessed with blueberries, they won't produce fruit for 2 years but I know it will be worth the wait :)
 
The builder left over a good bit of wood in our backyard so I am repurposing it to make a raised garden bed. I am also using some leftover hardi-board to line the raised bed with so it can match the house. It is going to be 10 feet long and around 4 feet wide. I had to call our HOA because everything has to be approved, I was so relived to find out that we can do whatever we want in the back and the only thing that needs to be approved is a fence, which we aren't installing.

The idea I have for the raised bed is something like this:
I've been told that we have lots of rabbits where we live so I may need to install
some chicken wire to keep them out! When we would visit the house last summer/fall we would always see rabbits running down the streets :)
 
I also purchased 10 Leyland Cypress trees from a vendor online, they came in and I hope to plant them next Wednesday.


------------------------
I finally got my desk yesterday! It has been hanging out in my in-law's barn after I had it painted. I love it. I have a before picture on here too so you can see the difference. I haven't decided about the top yet, I kind of like the idea of leaving it as it is, it's a rubber type of top. It's pretty beat up but I like the vintage feel. I had to get it repainted because it was starting to rust so it was sandblasted then painted. It looks TINY in this picture for some reason but it's really around 6 feet long and 5 feet deep! The opening for the chair is very small.

My rug should be here within the next 2 weeks to complete this room. I also want to style this desk, I need to look on pinterest for some ideas!

Before
 

Monday, February 17, 2014

Curtain Tutorial- The way I made my own custom curtains

Hey Everyone! I've been dreaming of this new house for right around a year now and now that we are in it, everything is coming together. Now, it's not coming together as fast as I would like but I'm so excited to continue making this house my home.

I've rambled a few times about making curtains and I decided that I wanted to post a tutorial on how I made them. Is it perfect? uuuuuuuuum no. But it's really easy and I think they look really great! I've had a sewing machine for about 15 years now and I started sewing on my own very early. I have only taken 1 sewing class, when I was about 14 and I made a lovely sun dress ;)

What I'm trying to say is that I feel like anyone can make curtains. As long as you are patient and can measure.

Decide on a fabric:
 I wanted the curtains I made for my Office and Dining room to be thick and rich. The width of the material is 54" and is medium to heavy weight. I purchased the fabric from www.fabric.com  ; free shipping over $35.00 and they cut you a 37" 'yard'.

How much fabric?:
In my new house I have 9 foot ceiling on the main floor level. In my office I hung my rod at 106" and in my dining room at 104". The difference is because I have crown moulding in my dining room. I hung these higher because it looks better in my eyes and it makes your windows seem larger. You can read other views on how to hang your rods in a million different places. The great thing about making your own curtains is that you can hang your rods wherever you want to because you can customize the length! So I made two panels for my office and 2 panels for my dining room.
I bought 7 yards for each curtain pair, so 14 yards total for the 2 rooms.

Decide on a liner:
 I decided to line both of these sets of curtains with blackout drapery lining. A few reasons. Blackout lining helps with the sun, obviously, but also has a sound dampening effect too. Just a nice little bonus. The blackout will also prevent fading of the material. I also like how thick it makes the curtains, they just feel nicer and look more custom (to me). You can also purchase regular lining. I feel like the blackout lining is easier to use because of the weight which means it does not move around easily while pinning.


  • Hang your curtain rod.
  • Measure from the arm of your curtain rod to the floor, this is your length (unless you want your curtains to puddle)
  • Whatever your length is, add 8" and cut. EXAMPLE: My dining room curtains are 104" long, but I cut my fabric & liner for 112" so that I have extra to use as my hem and rod pocket.

                                                                     ==============
IMPORTANT: If you are using a fabric that has a repeating pattern; MAKE SURE you cut your fabric on the same pattern. And make sure it's going in the same direction.
 Look what I did:


I was all proud that I was DONE with my dining room curtains when I realized, 10 pictures later, that my prints were not aligned. I was so caught up in making sure the direction of the print was the same I didn't even THINK about the repeating pattern lining up. *weeping* #rookiemistake #liveandlearn  So now I have ordered another couple of yards and I'm going to have to make another panel *crying*. oh well, I will never make that mistake again :)  
 
==============
Now that you have your fabric cut...Here we go!
 
 
Lay your fabric,  pattern side down, then lay your lining fabric on top. Smooth it over so there are no ripples in the fabric. If your fabric is wrinkly, then iron it. I do not wash/dry my fabric before I make the curtains. I will have them dry-cleaned if I ever need to clean them. If you want to wash and dry your curtains before sewing, then have fun ironing that mess out ;)
You will see my liner isn't as wide as the fabric, sometimes this won't happen but with mine it did.

 photo IMG_0808_zpsb1458f8b.jpg


The first step is to start your side hems. This part is the 'hardest' because your fabric may move easily. Since you are connecting your lining and fabric, be careful not to get it off alignment. Start with one side and fold over about 1 inch, iron (I iron with steam) and then pin. Go down the length of one side and then the length of the other.


 photo IMG_0810_zps2891490a.jpg

 photo IMG_0813_zpse2261306.jpg


 photo IMG_0816_zps68cb7ca9.jpg

 photo IMG_0817_zpsebd1b41c.jpg

Time to start sewing. Take a breath and just have fun. Sew down each side. After sewing both sides, put your fabric back on your table or floor.

 photo IMG_0820_zps1bdbd28b.jpg
 
 
You are going to fold these hems over once more to make a clean edge. This hem can be as thick as you want, I folded over about 2 inches because it was easy when I started to iron. Repeat what you did in the last step , making your hem as even as possible. Repeat on the other side.

 photo IMG_0822_zpsafff5d9f.jpg

 photo IMG_0824_zps5e7ea97a.jpg
 Now sew both sides.

 
Congratulations, you are almost done! (crazy right?!)
 
 -----------------------------
 
Decide which end of your panel is going to be your bottom hem. You can cheat a little here. Fold over about 3/4'' and iron, then immediately fold again to make a clean hem. Pin all the way down and sew. Done.

 photo IMG_0826_zpsaf166608.jpg

 photo IMG_0827_zps4c73855e.jpg

 
The non cheat way: Fold over the 3/4'', iron, pin, sew rough hem, then come back and fold again , iron again, pin again, sew again, done.
 
 photo IMG_0825_zps7654a676.jpg


Top Hem:
This can be slightly more messy because it will be 100% hidden by the rod pocket. Fold over the top of your curtain panel around 3/4" and iron, pin and sew. This can be slightly messy because you won't ever see this, it will be hidden by the rod pocket in your panel.

This is the point where I measure to make sure the panel is straight. Use your measuring tap and start at your bottom hem that you just finished in the previous step. Measure from the bottom of the curtain to the top where you are hemming now, no matter the number, just make sure you are even across.(whatever length of curtain you are making, this measurement will be around 5" LONGER, for example: My curtains final length are 104" so this measurement is 109")
Did I just confuse you? Basically make sure that at this point your curtain panels are not lopsided; and use your measuring tape.
 photo IMG_0895_zps381916c4.jpg

 photo IMG_0828_zps9974a609.jpg

Now sew the bottom hem and the top...almost done!
 
 --------------
With your curtain laid flat, place your measuring tape flush with your bottom hem again and let your measuring tape out to the length  you need your curtains to be. Measure from the bottom hem up to the top and fold over your curtain panel until you are at the correct length. I prefer to do both corners first and then do the middle of the curtain, it's just easier. You will be ironing these a lot because
this step is very important.
  My panels need to be 104" long;as you can see, the edge of the fabric is right
 at 104" mark.

 photo IMG_0896_zps25ef8e4b.jpg
You can also see the rough hem you just sewed in the previous step.
 
 photo IMG_0898_zpsf09e4c95.jpg
Triple check all of these measurements. If your curtain needs to be 104" in length make sure they are 104" long after they are ironed and pinned. Do not sew them until you are 100% sure, after you sew them it will be almost impossible to rip the seams and re-sew them, this part is very visible once the curtains are hung so make sure they are right!

Once you are ready to sew and you are confident your curtains are the correct length, go and sew. This is your  final step.
 
 
Trim your ends and go hang those bad boys!


Progression Shots: Dining Room
(will update when I make the corrected panel;) ) 

 photo DSC09321_zps10b407a6.jpg
 
 photo IMG_0904_zps5c664223.jpg

Friday, February 7, 2014

First Snow: Pictures of the exterior

Last week we had our first snowfall at the new house. It was beautiful! I haven't uploaded exterior pictures in a while so I thought I would add these. We are still missing our shutters and T-Braces.


----------------------------
 I'll be posting some pictures of my new curtains this weekend :) I'm loving how they are turning out! I am finished with the office pair and I'm hoping to finish the dining room curtains tonight. It seriously has been so easy to make them. I will probably write a tutorial with the post, I would love for some of you to show me your custom curtains that you've made!


Thursday, February 6, 2014

First power bill. dying. It's gotta be wrong

Dying.

Slowly.

Heart attacks.

Seriously!!

First power bill over $400 and it's gotta be wrong. The electric company said that there is NO WAY it should be that high. And I must add, that's not even for a full month. It's for 17 days. *gulp*

Saturday, February 1, 2014

Curtains and 30 day repair list.

My husband has been begging me to get curtains up...no not because of decoration because of the heating units. He's worried that our bill is going to be outrageous because we don't have any window treatments. He's probably right. I kicked into gear and ordered fabric to make some curtains and I'm anxiously awaiting for it to come in! Here's what I've got coming...


Sorry for the terrible picture! I ordered these sheers from Amazon and can I say, holy cow deal!? All four panels for $30 shipped, you can't beat that. They offer 84"/95"/108". I like to hang the curtains really tall so these are the 95" length in her room that is 8' tall.
Stock pic.
 
Lanie's duvet it the "Peyton" collection at Pottery Barn Teen. I've been trying to decide on curtains for her room for a while and thanks to a Facebook friend for the idea, I ordered 2 full size sheet sets (that are on clearance, yay!) that match her duvet and I'm making the curtain panels from them. They should be in next week. I'm planning on putting them behind the sheers...we will see how that looks.


Dining Room: I just love Fabric.com
"Claridge Vibrant Jacquard Nutella"
 The fabric below was on clearance for $8.04/yd. Plus free shipping and an extra 20% off.  
I can't wait to see how these turn out! Should be in this week sometime.


Fabric.com. This fabric wasn't on sale...
"Dwell Studio Vintage Blossom Slub Dove"
 It wasn't cheap but it's absolutely perfect for my office. The room feels cool with blues and greys so I wanted curtains that would match but that would soften how cool it felt. I am so excited to put these curtains up in there! 


I am looking for curtains for our main living room...it feels very rustic in there because of the dark hardwood, the stone fireplace, stained wood mantel and dark brown furniture. I need some color!

Update to our saga:
 
I emailed our 30 day list (which includes a bunch of stuff from our punch out list from 1 months ago) on Wednesday, have i heard back? NO! I didn't even get a "I go the email, will get in touch soon" typo of response.  So I'm giving it until Wednesday, if I don't hear..I'm going straight to the office to talk in person. We still don't have our hood vent kit (they lost it/threw it away, shocker).
 
Our pipes in our master bathroom (for our vanities) have frozen around 9 times already. This is something that I think is ridiculous...there may be a battle with this issue.
 
There is just too much to list but here's a picture of my list